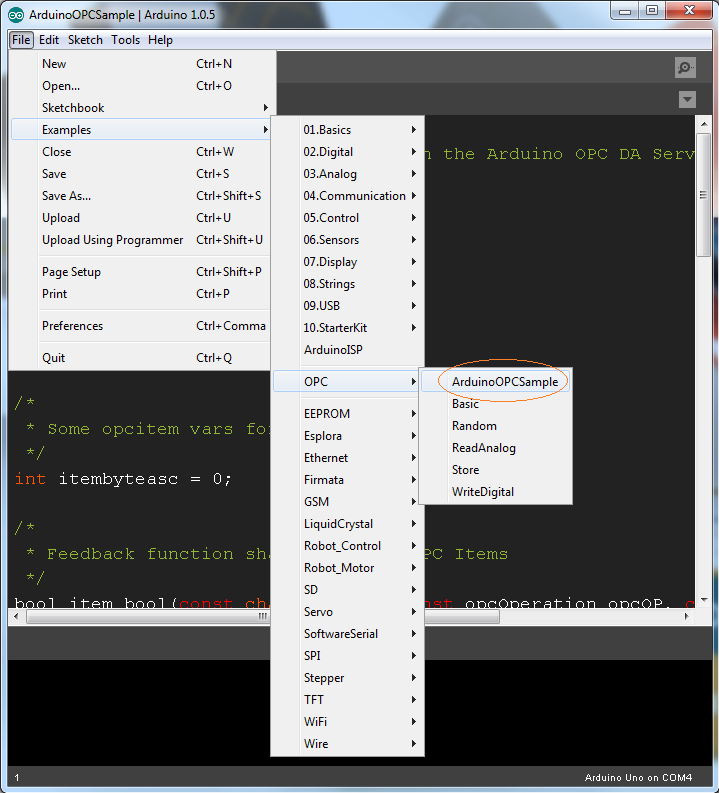
This time we will see how to test our sketch to operate with the Arduino OPC Server. First of all we could load an OPC Example or use our sketch for test its operation.
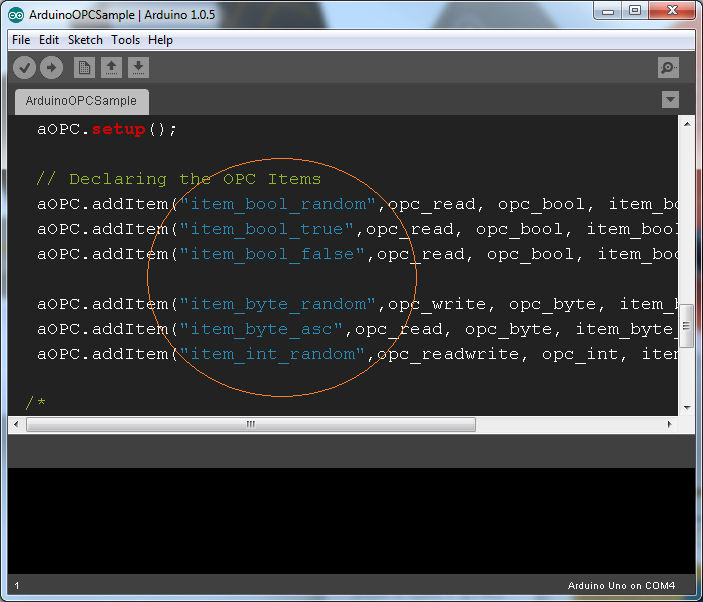
In the next picture we can see how OPC items are declared. These items will be available from our OPC Server to provide or set values to/from the OPC Client.
Now we can compile and upload sketch and use the serial monitor for asking your Arduino for available items, just sending a carriage return. Arduino should response with the available OPC Items.
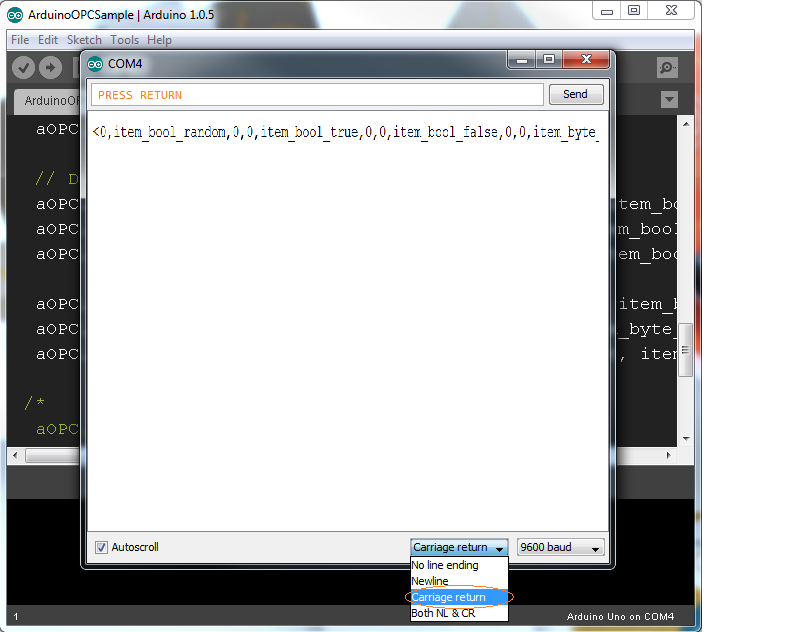
Remember to configure port monitor to send carriage return when press it. If you type the name of any OPC item, Arduino will return the associated value.

You can send OPC value to the Arduino using the = symbol. For example, in the WriteDigital example sketch, you could write led=1 or led=0 to turn on/off the led.
I hope this short tutorial will help you to test your use of the OPC interface.